


Master how to hang a picture perfectly with this step-by-step guide for beginners. Learn how to hang photos, photographs, and wall art securely using the right tools, spacing, and placement techniques to improve balance, avoid wall damage, and create a polished, professionally styled look in every room
Three holes in the wall. One crooked frame. And a picture that still isn't hanging right.
Sound familiar? Because that's how most people's experience with hanging pictures goes. You pick up a nail, eyeball the height, hammer it in and somehow it's always slightly wrong. Or the nail pulls clean out of the wall six weeks later and takes a chunk of plaster with it.
Here's the thing hanging photo frames and pictures is genuinely not complicated. But there's an order to it, and most people skip straight to step four. This guide starts at step one.
This is the decision that saves you three extra holes. Seriously. Before you do anything else, figure out what your wall is made of.
Most Indian homes have these. They're solid, they're strong, and they will absolutely destroy a standard nail if you try to hammer one straight in.
The correct sequence and all four steps matter:
Skip any one of these and the hook pulls out within weeks. The rawl plug is the step most people skip because it feels unnecessary. It isn't.

These walls are hollow behind the surface. That's the whole problem. A standard nail will go in easily and pull straight back out under any real load because there's nothing behind it to grip.
You have two good options: find a stud (the wooden or metal frame behind the drywall) using a stud finder and nail into that, or use a toggle bolt, which expands behind the surface and grips from the inside. Either works. Guessing doesn't.
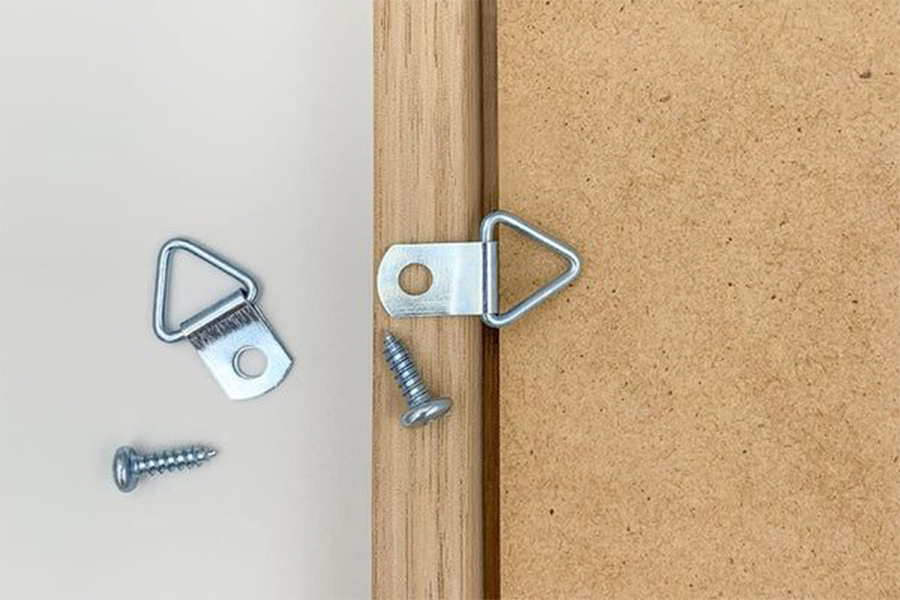
How to hang a picture depends a lot on what's already on the back of the frame. Most frames come with one of three things.
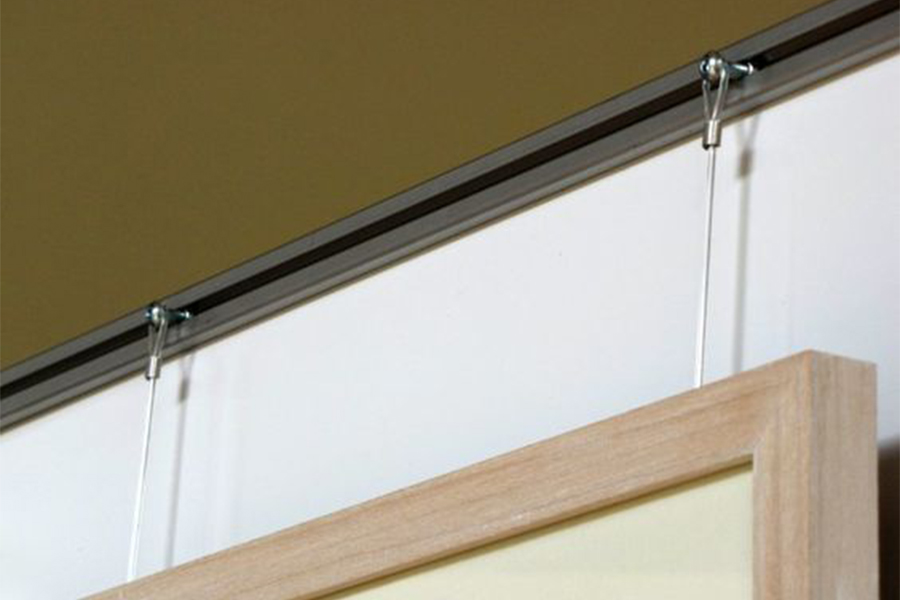
This is the most forgiving system because the wire gives you some flexibility in positioning. Use two nails spaced 10-15 cm apart rather than one this is what stops the frame from tilting over time. One nail and a wire will always drift.
One small detail that makes a real difference: angle the nails slightly downward when you hammer them in. The wire sits more securely on a downward angled nail than on one going straight into the wall.
These fix the frame to one specific position on the wall no sliding. The measurement matters here.
Measure from the top of the frame down to where the hanger sits. Subtract that number from your desired hanging height. That gives you where to put the nail.
If your frame has two D rings, both nails need to be at exactly the same height. Use a spirit level. No exceptions two nails at slightly different heights is what causes the permanent tilt that nothing fixes.
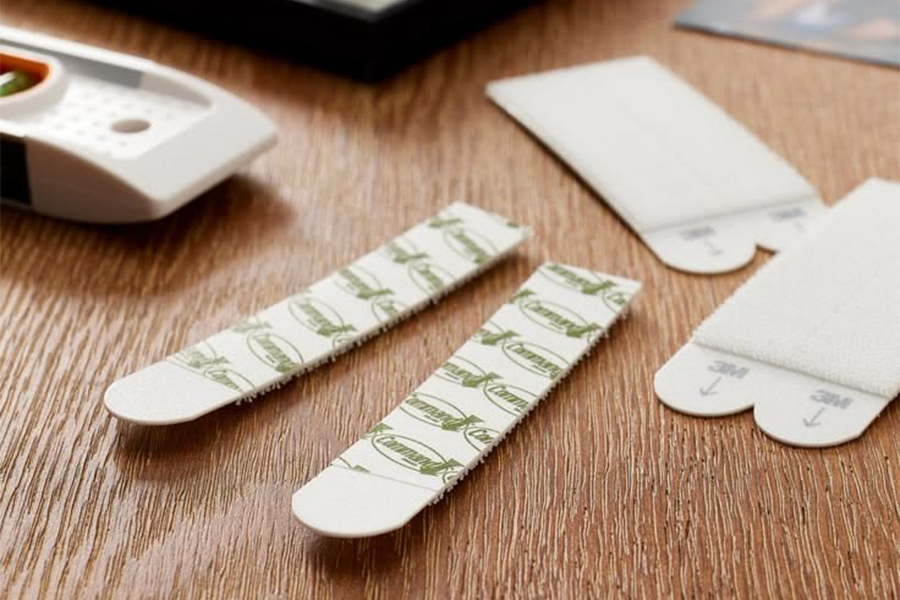
The damage free option, and genuinely useful in the right situations. Works on concrete, tiles, and drywall without any drilling. The process: press firmly for 30 seconds per strip, then wait a full hour before you hang anything. The adhesive needs that time to cure properly.
Two real limitations worth knowing: don't use them for frames heavier than 2 kg, and don't use them in humid rooms like bathrooms or kitchens. The adhesive bond weakens with persistent moisture.
57 inches from the floor to the centre of the picture.
This is the global gallery standard. It works because it sits at average human eye level the height at which a picture feels natural to look at rather than craned up toward or peered down at. Major art galleries worldwide use this number. It's not a suggestion, it's a starting point that almost always works.
Three important clarifications about this rule:
Furniture changes the equation. Here's what works for each situation.
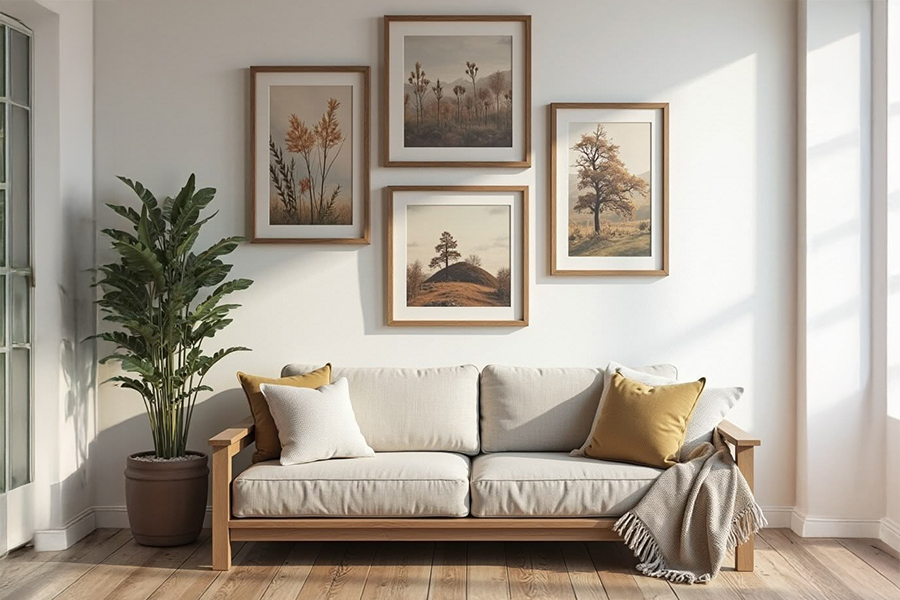
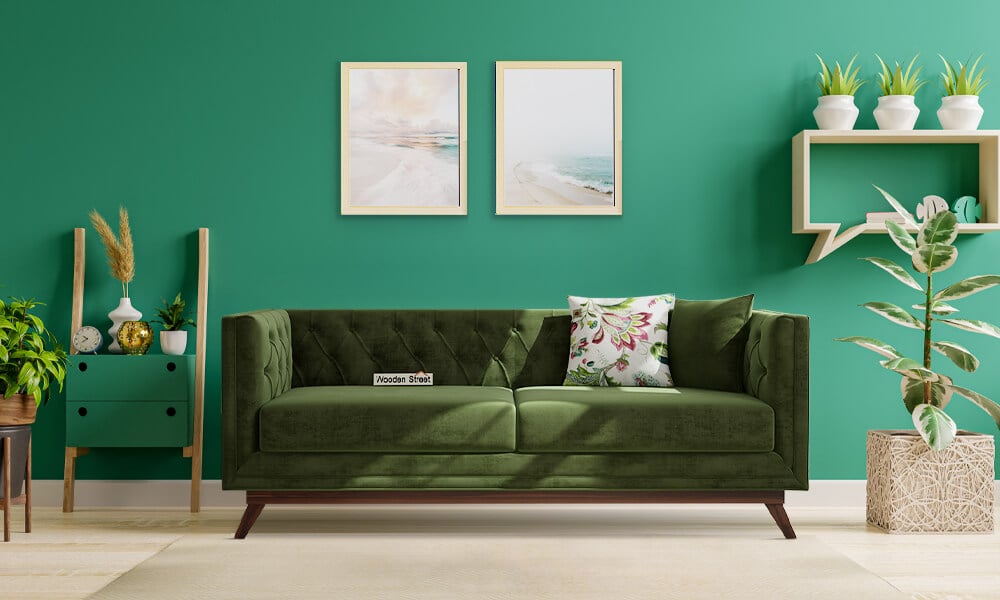
The bottom edge of the frame should sit 15-20 cm above the top of the sofa back. Any higher and the picture feels disconnected from the sofa like two unrelated things on the same wall. Any lower and people sitting down will knock their heads back into the frame.
Width is just as important: the artwork should be roughly two thirds the width of the sofa. A small picture above a wide sofa looks like a postage stamp. Get the proportions right and the whole wall reads as intentional.
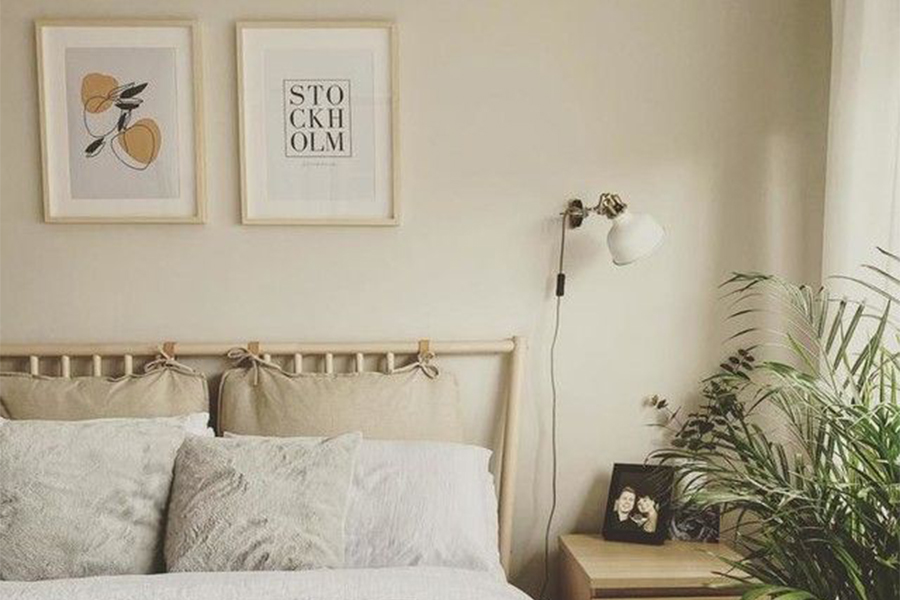
Bottom of the frame: 15-25 cm above the headboard. The wider range here accounts for headboard height variation.
One thing people miss centre the picture on the wall, not just on the headboard. If the headboard sits slightly off centre (which happens in many bedrooms), and you centre the artwork on the headboard, the artwork will look off on the wall. The wall wins.
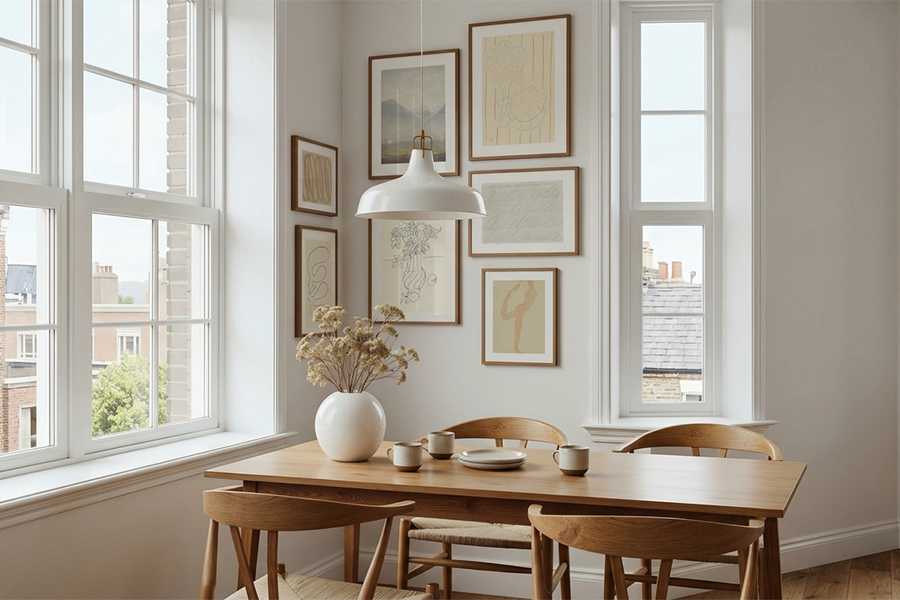
If there's a pendant light over the dining table, skip the wall above it entirely that space is already visually busy. The adjacent wall works much better for artwork in this case.
No pendant light? Aim for the bottom of the frame to sit at approximately 120 cm from the floor roughly seated eye level, so the picture is engaging whether you're standing or sitting at the table.
This is the method that eliminates wrong holes entirely. If you're hanging more than two frames, do this every single time.
Zero extra holes. Every time. This works whether you're hanging two frames or twenty.
How to hang photographs in a group comes down to three layouts. Pick one and commit.
Same size frames, consistent spacing of 5-7 cm between each one. Cleanest, most structured result. Works best when your frames actually match different sizes in a grid look like a mistake rather than a choice.
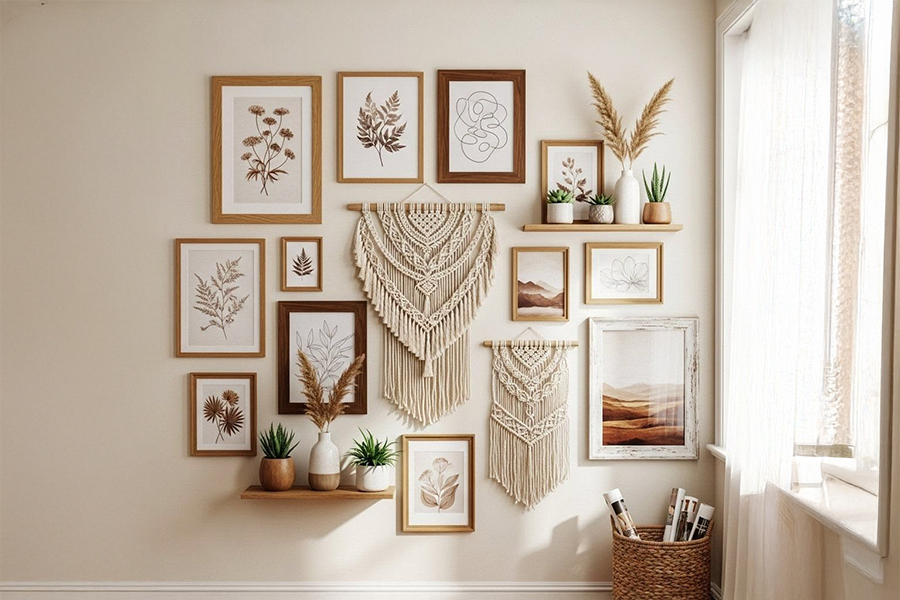
Mixed sizes, relaxed arrangement. Start by placing the largest piece slightly left of centre on the wall, then build outward from there. The rule that keeps this home decor arrangement from looking chaotic: keep the outer edges of the entire layout roughly rectangular, and maintain consistent 5-8 cm gaps between every frame. The outer shape stays structured even if the inner arrangement feels relaxed.
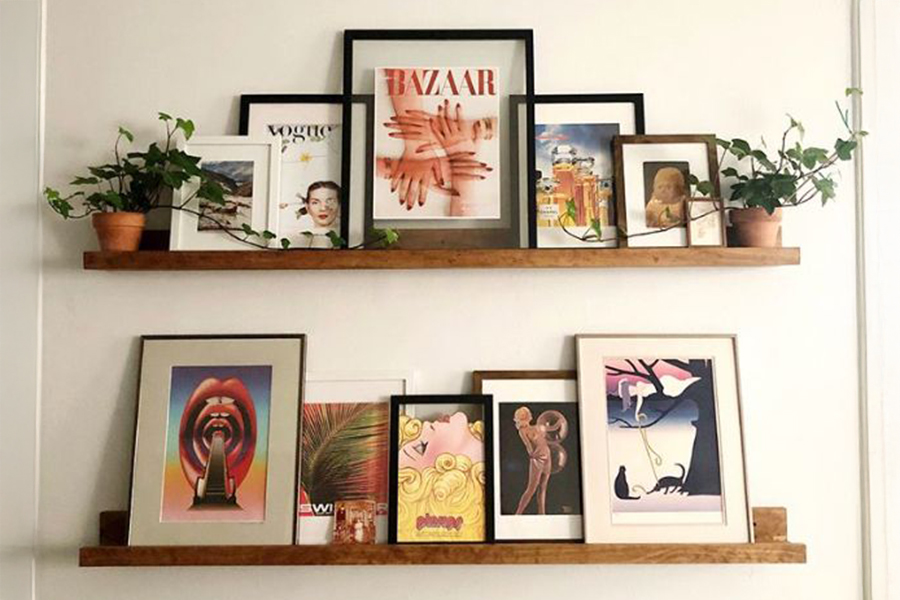
All frames aligned along one central horizontal axis. Works particularly well in hallways and above console tables long, narrow spaces where a scattered arrangement would feel cluttered.
Knowing how to hang photos properly is one of those things that looks effortless once you know the rules and frustrating every single time before you do. Get the wall type right, get the height right, use the paper template for groups, and every frame goes up straight the first time.
We will be back with the next blog soon. Till then, stay tuned!
Read More -
Horse Painting Vastu: Direction, Placement, Sunrise Benefits & Everything You're Not Being Told
Image Source: Pinterest, Google, and Wooden Street
A 57 inches from the floor to the picture's centre point. This is the gallery standard and sits at average eye level
A Use heavy-duty adhesive strips rated for the weight of your frame. Press 30 seconds per strip, wait one hour before hanging. Not suitable for frames over 2 kg
A Use the paper template method — trace each frame, mark the hanging point, tape to wall, nail through. Use a spirit level to confirm the line before nailing
A 15-20 cm between the bottom of the frame and the top of the sofa back. Artwork width should aim for two thirds of the sofa width
A On concrete walls: rawl plug + screw, full sequence. On drywall: stud or toggle bolt. Adhesive strips are not suitable for heavy frames
Trending Products
Top Picks from EveryoneArticles you will love to read

From the trendy cloud couch to practical floor sofa couches, this guide compares comfort, maintenance, durability, and everyday usability for Indian homes. Discover whether a boucle fabric sofa, teddy sofa, cloud sofa, or modern floor sofas can truly handle kids, guests, pets, heat, and daily living without losing style.
Continue Reading
Buying furniture before moving in can lead to expensive regrets. This guide shares practical furnishing tips for first time home buyers, including smart layouts, budgeting, sizing, and furniture buying advice for first time home buyers to help create a comfortable, functional, and future-ready first home
Continue Reading
Bring warmth and energy into your interiors with yellow furniture inspired by the latest summer furniture trends. This guide explores easy styling ideas, trending colors for spring and summer, and timeless décor updates that help your home feel bright, cheerful, and fresh long after the summer trend season ends.
Continue Reading
Learn how to choose sustainable furniture materials that balance durability, comfort, and environmental impact. This guide explores eco friendly furniture materials, sustainable upholstery fabrics, and eco friendly upholstery fabric options while explaining what to avoid when buying furniture made from sustainable materials for modern homes
Continue Reading
Master the basics of how to install wall shelves safely and securely with this practical guide. Learn floating shelf installation techniques, choose the right wall shelf brackets, understand wall shelf weight limits, and discover easy solutions for how to fix a loose shelf before it becomes a bigger problem
Continue Reading


